UP Farmer Registry: How to Complete the AgriStack Registration, Step by Step
This is the AgriStack Farmer Registry registration as it actually appears on upfr.agristack.gov.in in 2026 — captured screen by screen from a completed registration, from Aadhaar e-KYC through to downloading the Farmer ID.
- Before you start: what to keep ready
- Part 1 — Creating your account & Aadhaar e-KYC
- Part 2 — Logging in as a Farmer
- Part 3 — Residential & land ownership details
- Part 4 — Fetching land records from Bhulekh
- Part 5 — Social registry, department & consent
- Part 6 — e-Sign through CDAC
- Part 7 — Getting your Farmer ID
- Part 8 — Checking your application status
- Common questions
Before you start: what to keep ready
The registration runs smoothly only if a few things line up first. The single most common reason people get stuck is an Aadhaar that isn't linked to a working mobile number — every verification step sends an OTP there, so sort that out at a CSC or with your mobile operator before you begin.
Keep these within reach: your Aadhaar number, the mobile phone linked to it, your land record details (district, sub-district, village, and your Khasra/survey number from the Bhulekh extract), and your ration card or Family ID if you have one. Nothing needs to be uploaded as a file — the portal pulls most records digitally — but you'll be typing numbers from these documents.
Part 1 — Creating your account & Aadhaar e-KYC
Before you can register as a farmer, you create a login account, and that begins with verifying your identity through Aadhaar e-KYC.
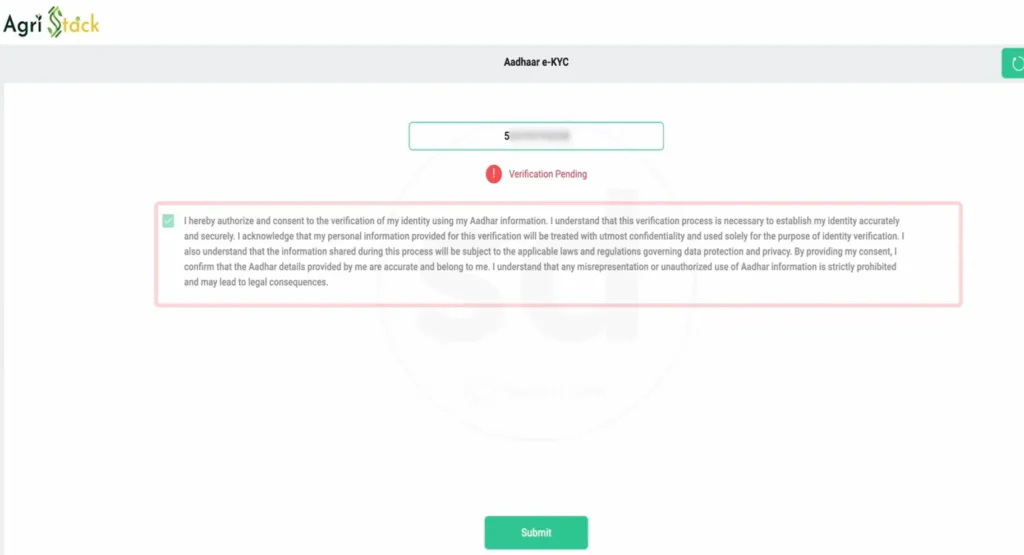
1Give consent and submit Aadhaar
On the Aadhaar e-KYC screen, tick the consent checkbox and press Submit. The status reads "Verification Pending" — that's normal; it's waiting for the OTP step.
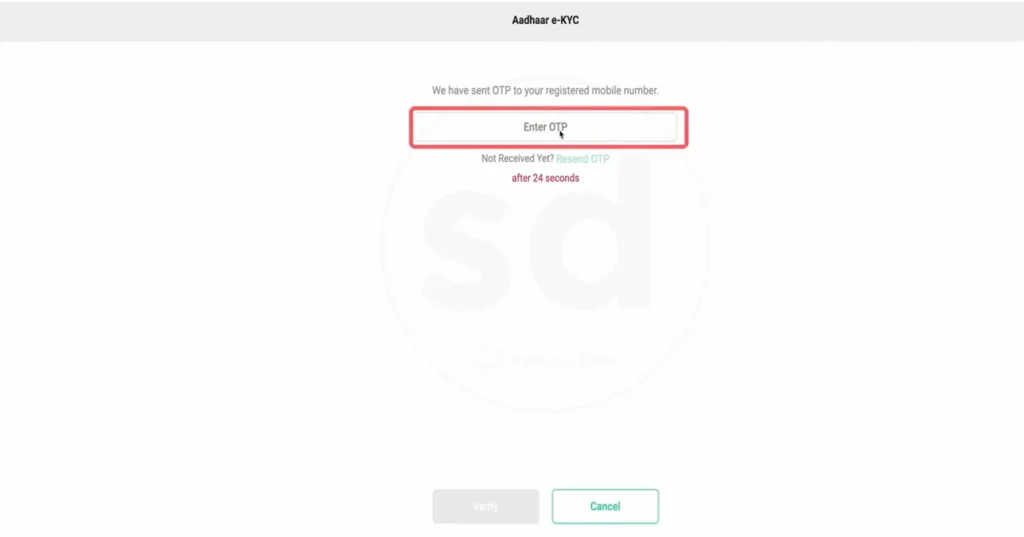
2Enter the OTP sent to your mobile
An OTP arrives on your Aadhaar-linked number. Type it in and verify. If it doesn't come, the Resend link unlocks after about 24 seconds — wait rather than refreshing, which restarts the step.
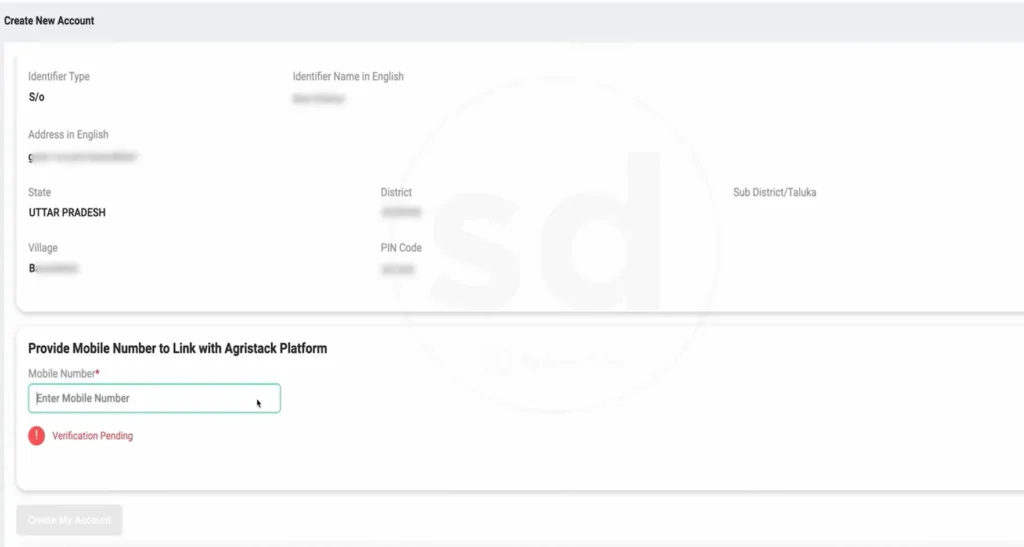
3Link your mobile number
Once Aadhaar verifies, the Create New Account screen shows your pulled details and asks for a mobile number to link with the AgriStack platform. Enter it and verify.
4Set your password
With the mobile marked Verified OK, set and confirm a password. If you see Invalid Password, it's the strength rule — mix upper and lower case, a number and a symbol.

5Account created
A Registration Successful message confirms the account is active. Note this creates only the login account — the farmer registration comes next, after you log in.

Part 2 — Logging in as a Farmer
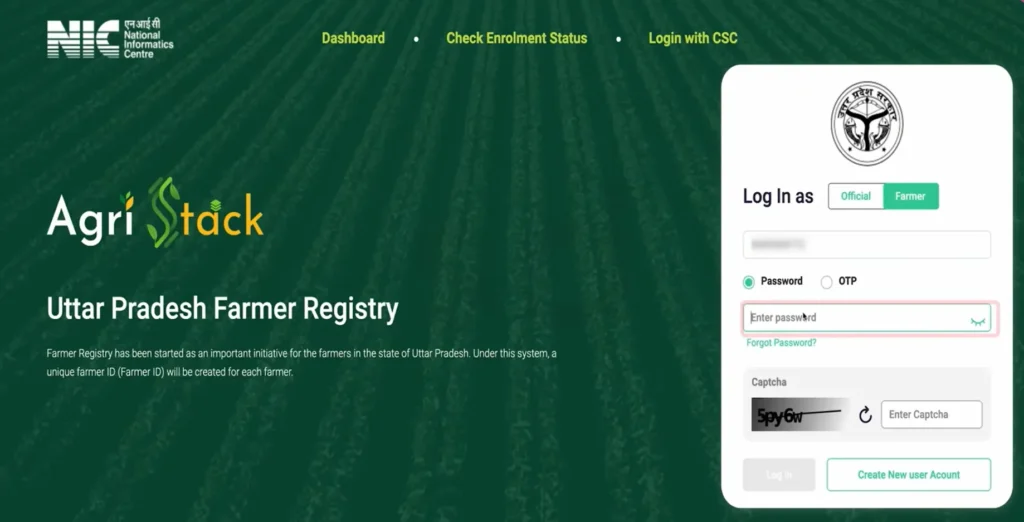
Back on the portal home there's a toggle: Official or Farmer. By default it may sit on Official, which is for government staff — switch it to Farmer.
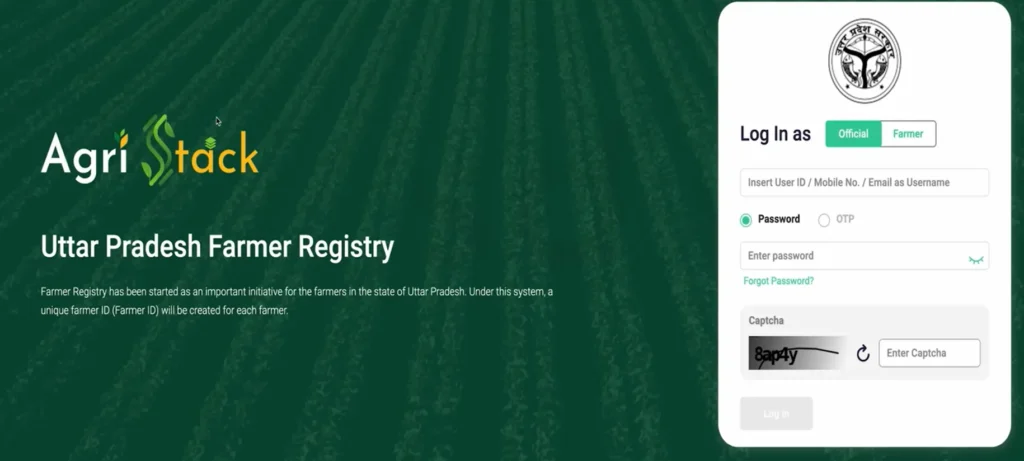
With Farmer selected, enter your registered mobile number as the username. First-time users can also create their account here using Create New user Account.

Enter your password (or switch to OTP), solve the captcha, and log in.
Part 3 — Residential & land ownership details
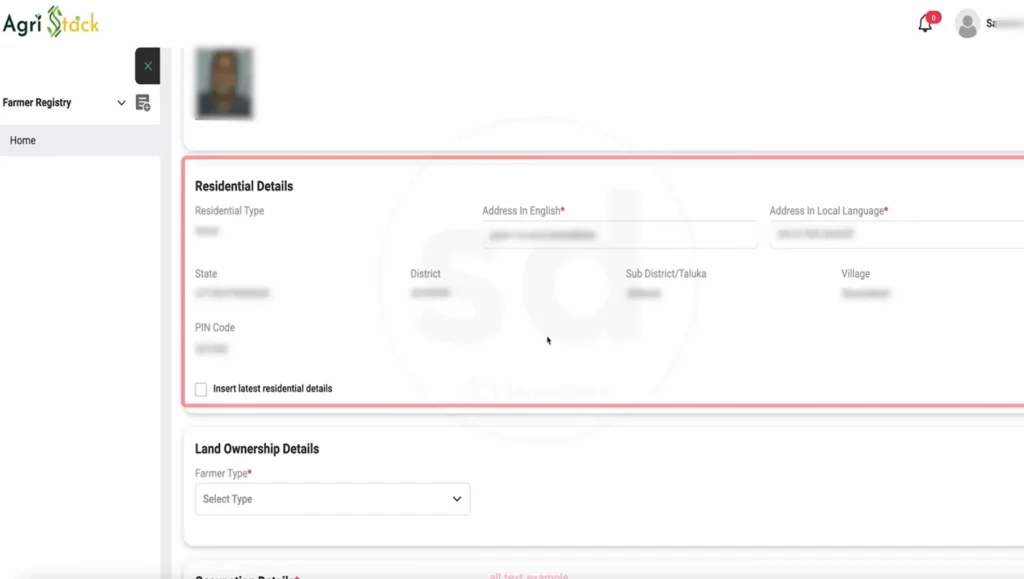
After login, the home screen shows your KYC details and a Register as Farmer button. Press it to begin the registration proper.

The form opens with Residential Details already populated from Aadhaar. There's a checkbox to insert latest residential details if anything changed. Below, Land Ownership Details asks for your Farmer Type — choose Owner if the land is in your name.
Part 4 — Fetching land records from Bhulekh
This step trips most people up, so slow down. The portal doesn't ask you to upload land papers — it pulls them live from the UP Bhulekh land-records system. You just point it to the right plot.
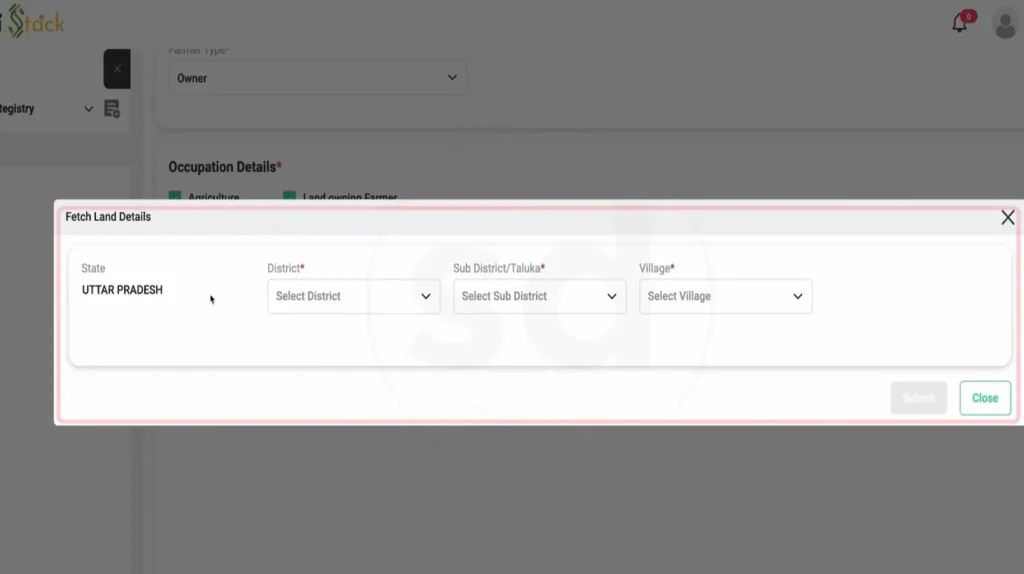
1Select district, sub-district, and village
A Fetch Land Details box opens with the State fixed as Uttar Pradesh. Choose your District, Sub-District/Taluka, and Village.
2Find your Khasra number on the Bhulekh extract
The number you need is the plot/Gata number from your Bhulekh Khatauni extract (उद्धरण खतौनी). Match it carefully — one wrong digit pulls a different plot's owners.

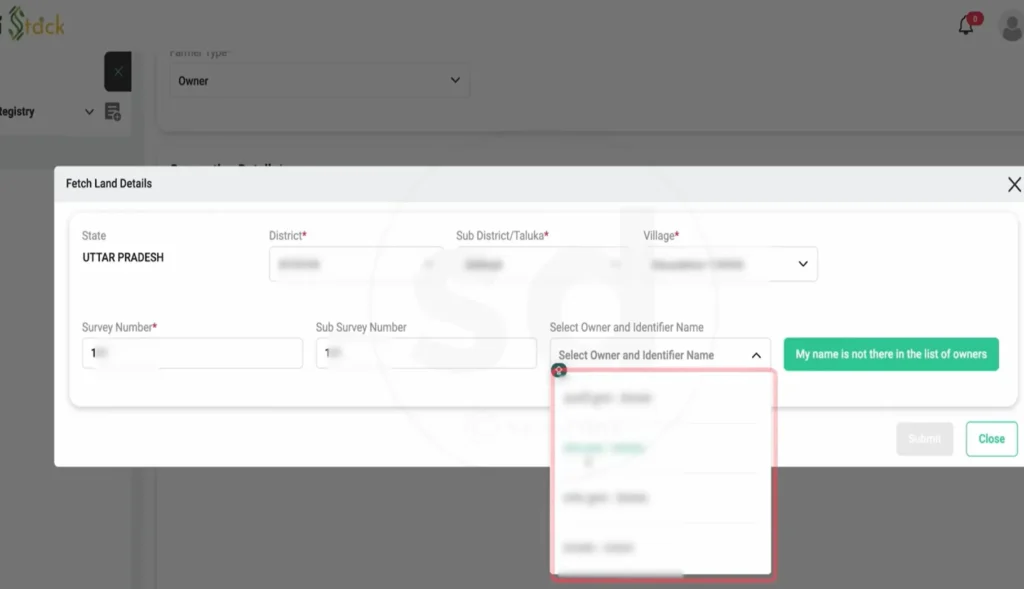
3Enter the survey number and pick the owner
Type your Survey (Khasra) number. The portal lists the registered owners for that plot — select your name from Select Owner and Identifier Name. If your name genuinely isn't there, use the "My name is not there in the list of owners" option.
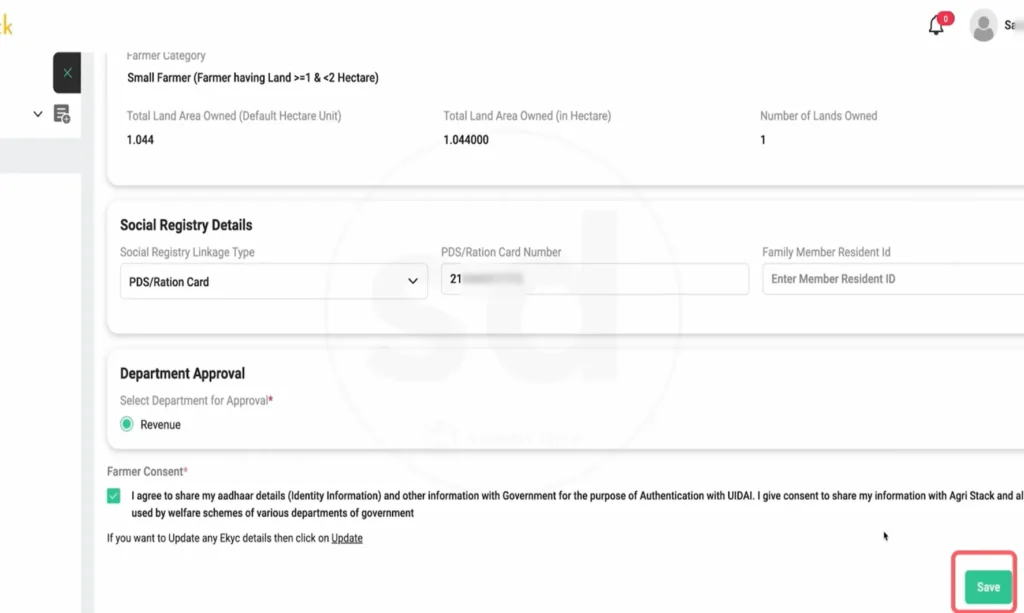
Part 5 — Social registry, department & consent
Once land is linked, the form shows your computed Farmer Category (for example, Small Farmer for holdings between 1 and 2 hectares) and total land area. Below is the Social Registry section.
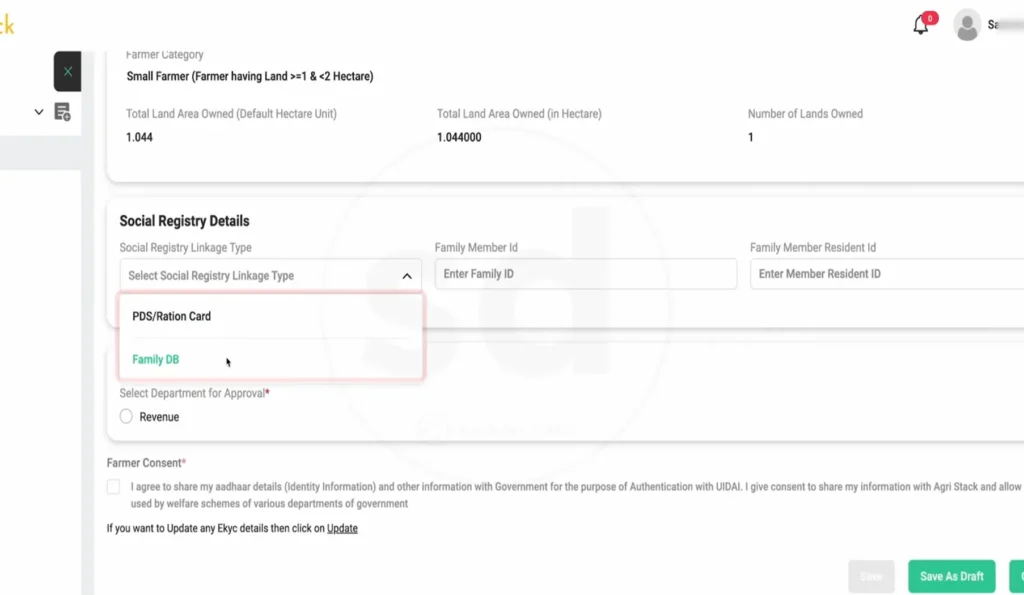
Pick your Social Registry Linkage Type — PDS/Ration Card or Family DB — and enter the matching number. Then choose the department for approval (Revenue or Agriculture), tick the Farmer Consent box authorising Aadhaar sharing under UIDAI, and press Save.
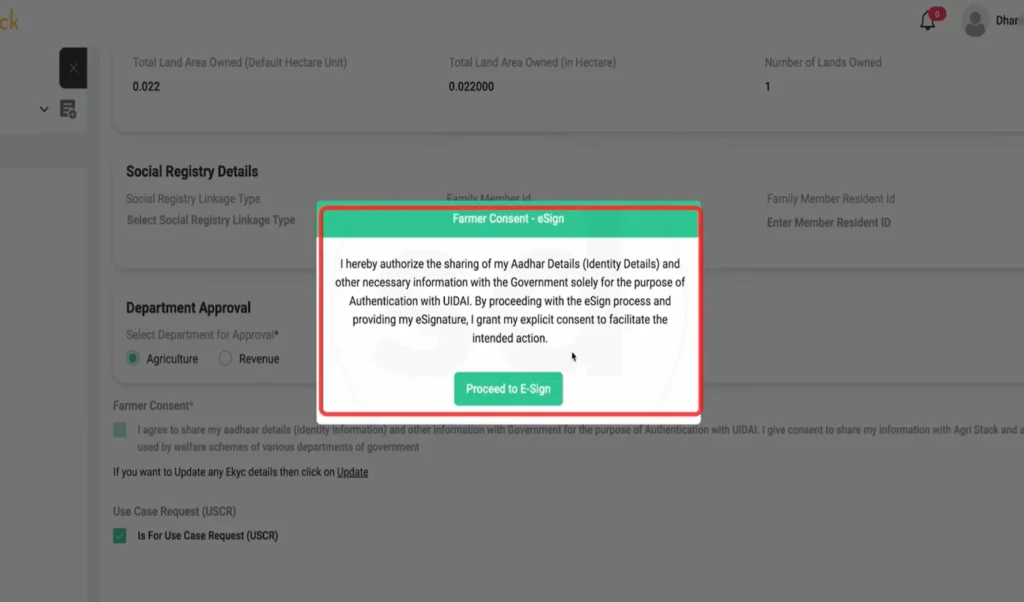
Part 6 — e-Sign through CDAC
Saving brings up the Farmer Consent – e-Sign dialog. This is the legal authorisation step. Press Proceed to E-Sign.
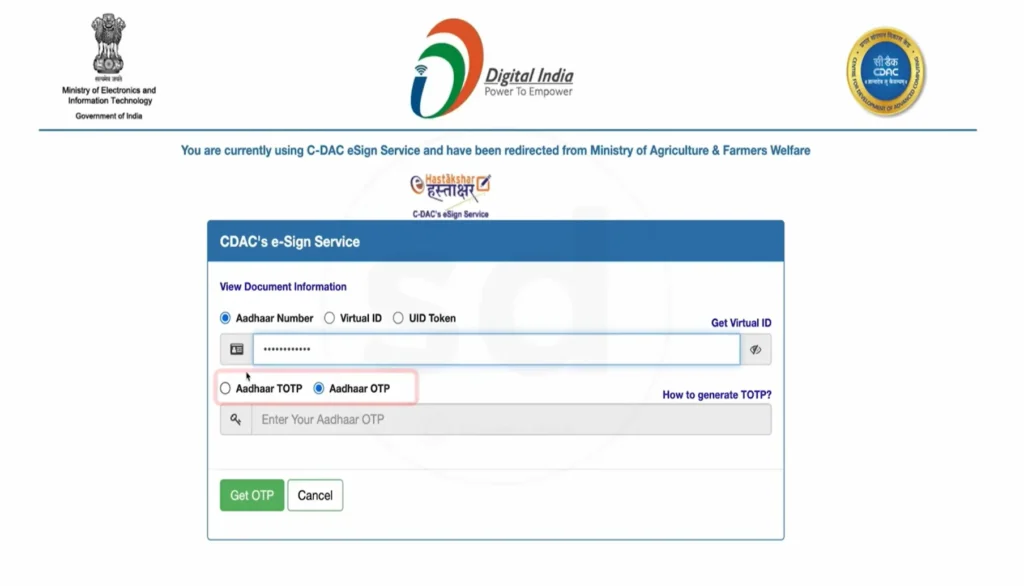
You're redirected to the C-DAC e-Sign Service (the official Government of India signing gateway, branded Digital India). Enter your Aadhaar number, choose Aadhaar OTP, get the OTP, and complete the signature.
Part 7 — Getting your Farmer ID
After signing, the form reloads showing your details verified — including a Name Match Score (100 means your Aadhaar name and local-language name matched exactly), your contact details, and at the top, your Farmer ID and Farmer Enrollment ID.
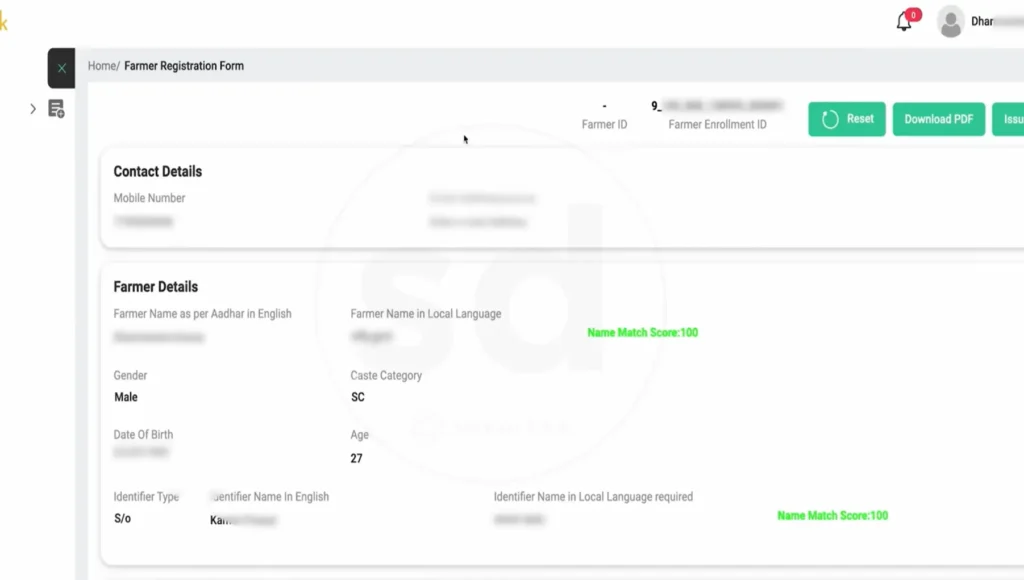
Use the Download PDF button to save your registration form. Keep both the Farmer ID and the Enrolment ID — the Enrolment ID is what you'll use to check your application status while it's under verification.
Part 8 — Checking your application status
After you submit, your registration isn't approved instantly — it goes for verification. Track it any time without re-registering: log in as a Farmer, then open Check Enrollment Status from the left menu.
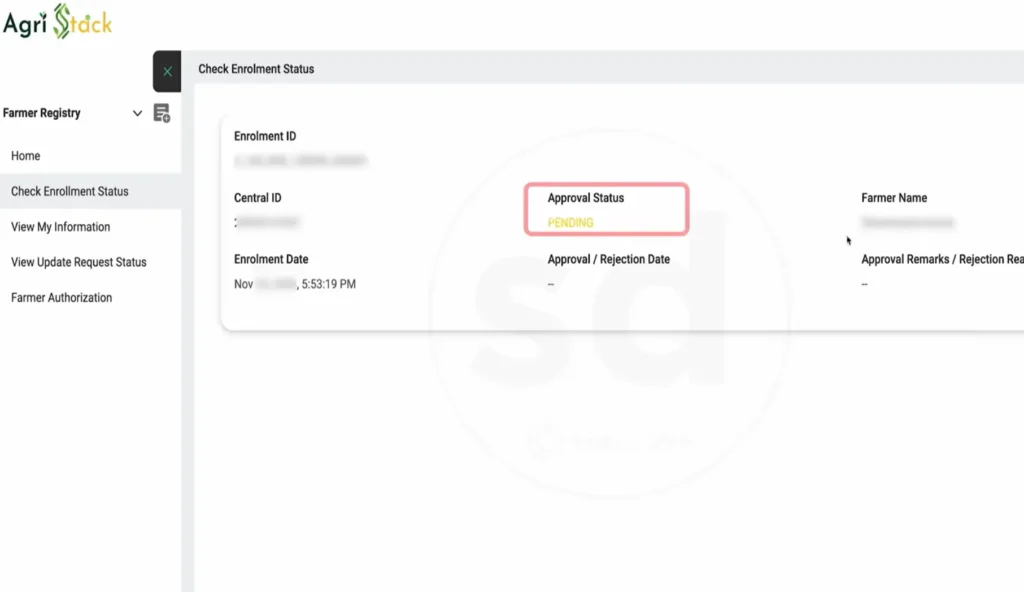
The screen shows your Enrolment ID, Central ID, enrolment date, and the key field: Approval Status. While it's being checked this reads PENDING, and the approval/rejection date and remarks stay blank. Once a decision is made, the status updates and any remarks appear.
Common questions
I never received the OTP — what now?
The OTP only goes to the mobile number linked to your Aadhaar, not any other number. If nothing arrives, the number probably isn't linked. Wait for the resend timer once; if it still fails, get your mobile linked to Aadhaar at a CSC or Aadhaar centre, then start again.
My name isn't in the owner list when fetching land — is registration blocked?
Not necessarily. The "My name is not there in the list of owners" option exists for exactly this. It usually means the Bhulekh record needs a mutation update at the tehsil. You can proceed through that route, but a record correction may be needed for full approval.
What's the difference between Farmer ID and Enrolment ID?
The Enrolment ID is generated when you submit and is used to track your application while it's verified. The Farmer ID is your permanent digital farmer identity, confirmed once approved. Both appear on your downloaded PDF.
Why did the page redirect me to a different government website?
That's the CDAC e-Sign service — the official signing gateway under the Ministry of Electronics and IT. The registration genuinely uses it to apply your digital signature, so the redirect is part of the legitimate flow, not an error.
Is there any fee to register?
Registering yourself online is free. If you go through a CSC centre for help, the operator may charge a small service fee for their assistance — the registration itself still costs nothing.