To get a Farmer ID, you register on your own state’s Farmer Registry portal or app, verify yourself with Aadhaar, claim your land from the state’s land records, and sign the consent with Aadhaar e-Sign. After you submit, you receive an enrolment number by SMS. Once state officials approve your claim, your Farmer ID is generated.
This guide walks through every step of self-mode registration, the option where you register yourself. We base the steps on the official Uttar Pradesh self-mode user manual and the national AgriStack FAQ, because the screens are built on the same reference application in most states. Your state’s buttons and labels may be slightly different.
Every state has its own address, usually in the form xxfr.agristack.gov.in (for example upfr, mhfr, mpfr). Find yours in our state portal directory. AgriStack.net does not have a registration form and will never ask for your Aadhaar, password or OTP.
Before you start: a 5-minute checklist
Registration goes smoothly when you have these ready. Our documents checklist explains each item in more detail.
| Have ready | Why you need it |
|---|---|
| Aadhaar number | Identity verification (e-KYC) and e-Sign |
| The mobile phone linked to your Aadhaar | OTPs for e-KYC and e-Sign come to this number |
| A mobile number for your account (can be the same) | Login, enrolment number SMS and updates |
| Land details: district, sub-district or tehsil, village, survey/khasra/gata number | To find land that is not shown automatically |
| A copy of your land record (khatauni, 7/12, jamabandi, patta, etc.) | To check that your name and survey numbers are correct |
| Internet connection and about 20–30 minutes | The session may expire if you leave it idle |
1. Is your mobile linked to Aadhaar? If not, you will not receive the OTP. The UP manual names this, along with UIDAI server delays, as the two reasons an OTP does not arrive.
2. Is the land recorded in your name? If the land record still shows a deceased parent or the previous seller, sort out the mutation first. Otherwise the claim may be rejected.
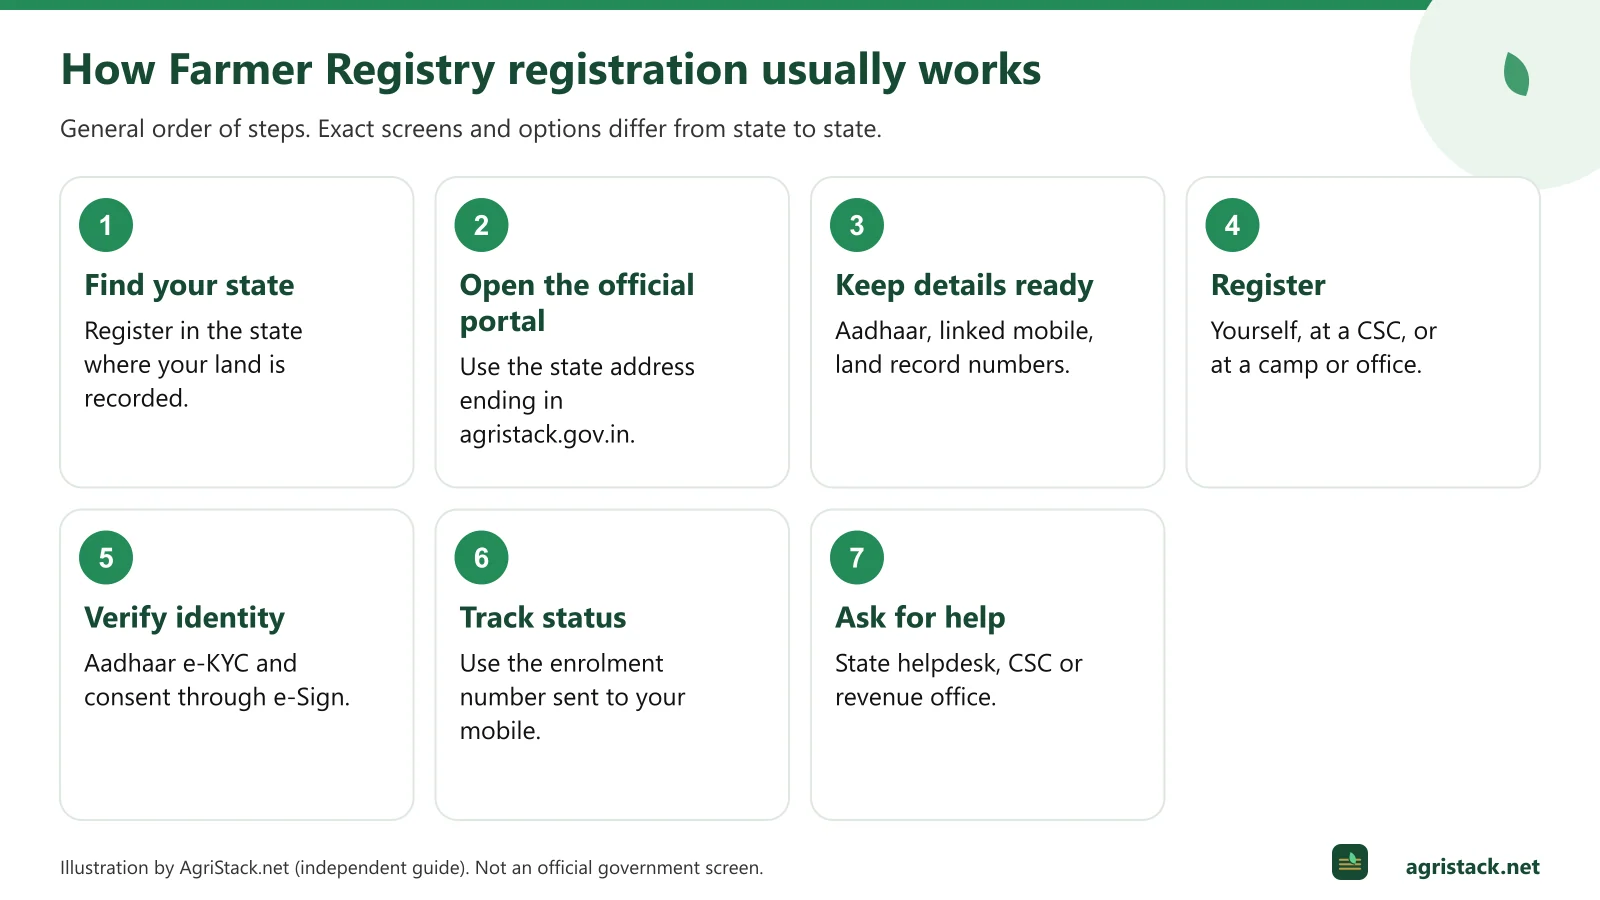
Step 1: Open your state portal and choose self mode
Open your state’s Farmer Registry portal in a browser, or install the official app linked from it. Most portals offer more than one way in:
- Farmer (self mode): you register yourself;
- Official or Department: for agriculture and revenue staff;
- CSC or Assisted mode: for Common Service Centre operators and other authorised facilitators.
Choose the farmer option. New users choose Sign Up or Create New User Account.
Step 2: Sign up with Aadhaar e-KYC
In the UP self-mode manual, signing up works like this:
- Click Sign Up and enter the farmer's Aadhaar number.
- Click Submit. An OTP is sent to the mobile number linked to Aadhaar.
- Enter the OTP and click Verify. Your details are fetched from Aadhaar.
- Click Next, then enter the mobile number you want to use for this account.
- Verify that mobile number with the OTP sent to it.
- Create a password, re-enter it and click Next. A popup confirms the account was created.
Tip: Choose a password you can remember but others cannot guess. You will need it to check status and update details later. If you forget it, see Farmer Registry forgot password.
Step 3: Sign in and start “Register as Farmer”
Sign in with your mobile number, password and the captcha shown on screen. After signing in, choose Register as Farmer. If the captcha keeps failing, see captcha not working.
Step 4: Check and complete your personal details
The form opens with details fetched from Aadhaar. In the UP manual, the sections are:
- Farmer details: name and basic details from Aadhaar. These cannot usually be edited here, because they come from Aadhaar.
- Farmer photo: taken from Aadhaar.
- Residential details: your address. If it was not fetched correctly, the UP portal offers an option to insert the latest residential details. Choose your village from the dropdown.
- Ownership details: choose your farmer type from the dropdown, for example owner. The options are set by your state.
- Occupation: confirm the declarations (in the UP manual, two checkboxes) and continue.
Check spellings carefully. If your name in Aadhaar is wrong, stop and correct it at an Aadhaar centre first. A wrong Aadhaar name will lower your name-match score in the next step.
Step 5: Claim your land
This is the most important part of registration. The portal reads the state’s land record (record of rights, or RoR) and you claim the plots that belong to you.
5a. Fetch land shown under your name
Click Fetch Land Details. If your Aadhaar has already been linked to your land through earlier scheme data, some plots may appear automatically. The official FAQ explains that land already linked to your Aadhaar “would be shown automatically to farmer after he does his eKYC authentication”.
5b. Search for land that is missing
If some or all of your land is not shown:
- Select the district, sub-district/tehsil and village where the land is.
- Enter the survey number (khasra, gata or plot number, depending on your state) and click Submit.
- Select the sub-survey number if your land has one.
- From the list of owners, select your name, then click Show Land Details.
- Check the area and details, tick the checkbox and click Add.
- Repeat for every plot you own, including plots in other villages.
If your name is not in the owners list: the UP portal has an option, “My name is not there in the list of owners”, which searches the live land record. If your name still does not appear, the land is probably not recorded in your name. See land details error and missing plots.
If the village does not appear in the dropdown, see village not showing in Farmer Registry.
5c. Verify all lands and the name-match score
Click Verify All Lands. The system compares the name in your Aadhaar with the owner name in the land record and calculates a name-match score for each plot. The official FAQ says 0 means no match and 100 means a perfect match, and that each state decides its thresholds.
In Uttar Pradesh, according to the official manual:
| Score | Result |
|---|---|
| 80 or above | Approved automatically by the system |
| 16 to 79 | Goes to the Lekhpal for approval |
| 15 or below | Blocked; not allowed |
A medium score does not mean you did anything wrong. It is common when names are spelt differently in Hindi and English records, or when a middle name or caste name is missing in one record. It just means a person will check.
Step 6: Consent, declaration and e-Sign
- Read the consent and declaration screen. Tick the boxes and click Submit.
- On the Farmer eSign screen, tick the boxes and click Proceed to eSign.
- Choose OTP-based authentication, enter the Aadhaar number, and enter the OTP sent to the Aadhaar-linked mobile.
- Tick the confirmation box and click Submit. A message confirms that your land details were added.
The official FAQ explains why this step matters: your farmer and land linkage “are not shared with any external entities, without an explicit consent from the Farmer, which the Farmer needs to provide with e-sign”. Read more in consent and data sharing.
If e-Sign fails or the OTP does not arrive, see e-Sign problems and OTP not received.
Step 7: Save your enrolment number
After submission, an enrolment number is sent by SMS to your registered mobile. Write it down and keep the SMS. The FAQ says this number “can be used to track the status of their claim”. It is not your Farmer ID. See enrolment number vs Farmer ID.
Step 8: Approval and Farmer ID
State revenue officials review claims that are not approved automatically. The FAQ says the onus to approve or reject is on them, and that states can set an auto-approval if officials do not act within a fixed time. Once the claim is approved, the Farmer ID is generated, typically within about 24 hours, according to the FAQ.
Check progress with the Check Enrolment Status option on your state portal. In Uttar Pradesh, the manual points to this option at upfr.agristack.gov.in. Our status check guide covers other states, and the approval process explains what happens behind the scenes.
After you get your Farmer ID
- Add land you missed. The UP manual describes the Update Farmer Request (UFR): log in, choose “Update My Information”, then “Land Ownership and Land Details”, and use ”+ Add New Land (Owned)”. The UP manual says UFR can be used only after the Farmer ID is approved.
- Keep your mobile number current. Updates and OTPs come to it. See mobile number change.
- Use it for schemes. Give your Farmer ID when a scheme asks for it, only on official portals or at official counters.
Other ways to register
Self mode is not the only option. The Ministry has said farmers without mobile phones can get help from Farmer Producer Organisations, Krishi Sakhis and Common Service Centres, and that states hold camps “so that no farmer is left out”.
| Option | Good for | Read more |
|---|---|---|
| Common Service Centre (CSC) | Farmers without an Aadhaar-linked phone; biometric e-KYC | CSC registration guide |
| Village registration camp | Farmers who want officials on hand to check land records | How camps work |
| Agriculture or revenue office | Complex cases such as inheritance or disputes | Helpline and offices |
Common problems and quick fixes
| Problem | Most likely cause | What to do |
|---|---|---|
| OTP not received | Mobile not linked to Aadhaar, or UIDAI server delay | Wait and retry; update mobile in Aadhaar. Guide |
| Land not showing | Not in your name in the RoR, or wrong village/survey number | Check your land record. Guide |
| Low name-match score | Spelling differs between Aadhaar and land record | Correct Aadhaar or land record. Guide |
| e-Sign failed | OTP timeout or service unavailable | Retry later. |
| Portal not opening | Heavy traffic or maintenance | Try off-peak hours. |
| Session expired | Idle too long on a form | Log in again and continue. |
Safety reminders
- Do not share OTPs with anyone on the phone, even someone claiming to be from the government.
- Do not pay anyone who promises to “speed up” your Farmer ID.
- Use only official apps linked from your state portal. See how to identify official apps.